Tuesday, April 21, 2015

Antonyms


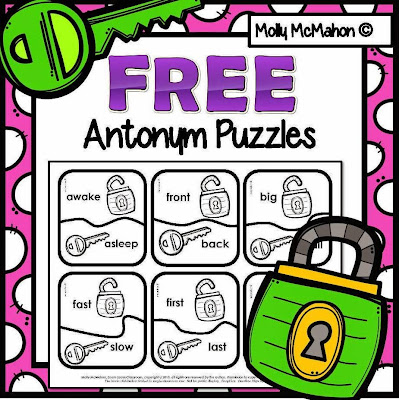
I have a free antonyms puzzles file!  You can get it by scrolling down to the end of this post.  If you'd like to read some of my thoughts about antonyms, read on.

My Own Experience  My own first memory of when I understood the concept of antonyms was through the use of a seesaw.  I observed myself go up and down as my friend was in the opposite position.  I was five or six years old.  This kinesthetic experience caused another light bulb to be turned on in my brain.  I now knew what an antonym was. 

Teaching Antonyms in the Early Years  When our students are kindergartners, we offer them visual, tactile, and kinesthetic examples of opposites.  We flick the classroom lights ON and OFF.  We have the children speak LOUDLY.  Then we have them talk SOFTLY.  We have them rub their fingers against a SMOOTH stone.  Then we have them feel a ROUGH stone. 

Teaching Antonyms in Lower to Middle Elementary  When our students are second, third, and fourth graders, they begin to READ antonyms.  As educators, we have them find and match antonym pairs together.  We have them share their own ideas of antonyms.  Antonyms are an important part of vocabulary development.  They are woven in the Common Core Standards as well as in the Virginia Standards of Learning.  (If you are curious about where these standards are found, view the listings at the end of this post.)

The English Language  The English language as many words that have multiple meanings.  That becomes a deficiency when kids match antonyms with words that have more than one meaning.  The word, "north" is usually thought of as the antonym for the word "south".  However, many words have multiple meanings.  Therefore, antonyms should be taught in context.

                     Let's take a look at the word "low". 

Here are a few examples of what the word, "low" can mean:

            1.  a position in space
          2.  the pitch of a voice
          3.  an emotion when feeling "down"
          4.  a score on a test 

                     "Bobby's" Experience.

Bobby is a young lad in third grade.  His third grade teacher is playing a game with antonyms.  It's Bobby's turn and she has asked him to tell her what the antonym for "low" is.  Bobby thinks for a moment, and answers with the word "happy".  The teacher is puzzled.  She expected Bobby to say the word "high".  Bobby did not know what his teacher was thinking.  Bobby's teacher did not provide a background for which she was using the word "low".

It's no wonder that children get confused when required to complete work with antonyms.  If we do not offer a structure behind the vocabulary that we are teaching, it becomes an act of memorizing antonym pairs instead of what the original purpose of the skill was.  That is, to increase a child's knowledge of word meanings. 

What Students Need to Know  There are two prerequisites that a child must have in order to be successful with antonyms.  The first one is the concept itself.  (I got the concept after the seesaw ride.)  The second thing needed is language development.  If a child doesn't know the meaning of a word, it will be impossible for him/her to pair it with an antonym.  When a child is required to complete a worksheet on antonyms, there is a third prerequisite.  That is reading proficiency.  A child could have the concept AND the vocabulary but lack the reading ability.    

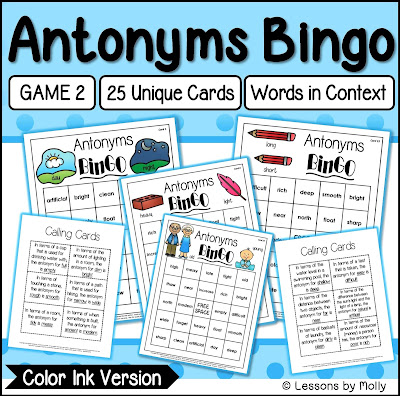
My Products  If you have visited my store, you know that I enjoy making bingo games.  Six of my most recent products include antonym bingo games.  I made a beginners level.  Then I made a game that is one step above beginners.  I gauged the levels by the difficulty of the words.  I made antonym bingo games that are printed with BLACK ink.  I also made antonym bingo games that require COLOR ink.  There are also bundle deals.  Each bingo game has two sets of calling cards.  The first set includes the antonyms for the words printed on the bingo sheets.  The second set of antonyms provides a context for how the words can be used.

Here are a few pictures from the beginners set:


This is from the color set for the beginners version.

 Everything seen here is also available in printer friendly, BLACK ink.
 
I used images from Whimsy Clips on the bingo sheets.  I use the same 24 words on each sheet.
 
The images on the bingo sheets provide children with a visual example of an antonym.

In all, there are 25 bingo sheets with 5 templates (images) included -  five bingo sheets per template.

Here are a few pictures from the set that is one step above beginners:
 
There are 25 bingo sheets in the second game.  There are 4 templates (images) used.

There are 24 words used in the second bingo game.  The same 24 words are used on every bingo sheet.

The reading level as well as the vocabulary words used is a higher level in set 2 compared to set 1.

If you are interested in any of these games, click an image below:


Here are the k-5 Common Core standards which are tied to antonyms:


These are the related Virginia Standards of Learning which were adopted in the year 2010:

SECOND GRADE - Oral Language - 2.2-d

THIRD GRADE - Reading - 3.4-b

FOURTH GRADE - Reading - 4.4-b

FIFTH GRADE - Reading - 5.4-c

If you have read this blog post this far, then you deserve a FREE antonym center for your class.  Click on the image below to get it!
https://www.teacherspayteachers.com/FreeDownload/antonym-puzzles-free-1822437

Thank you for reading and following me.

Lessons by Molly © 2015  All rights reserved.

Sunday, March 15, 2015

st.-patrick's-day-children's-song

Saint Patrick's Day Children's "Singable Book"

You don't have to be Irish to celebrate Saint Patrick's Day!  If you are planning a Saint Patrick's Day thematic unit during the school day, you might like to view this POST and grab a free pattern of a pot for a "Pot of Gold" craft.  Or, you can just get the pattern HERE.

I love "singable" books for children and I believe kids should sing every day.  It's "brain pleasing"!  I have a Saint Patrick's Day resource at my Teacher's Pay Teachers shop called, Saint Patrick's Day Treasure Hunt.  One of the items included in the packet is a printable book.  I used the tune from "Here We Go Round the Mulberry Bush".  There is rhyme, repetition, and alliteration in the text which you will hear when I sing it to you.  The book is written with my own words and is copyrighted by me.  If you are considering purchasing the packet, I though it would be helpful for you to have an idea of how to sing the words with the tune.


The children in the booklet that I made are playing various musical instruments as the reader "sings" the booklet.  I couldn't have imagined a more perfect set of graphics!  They were created by Laura Strickland.  You can view her website at Whimsy Clips.


Don't forget to wear green on March17th.  Happy Saint Patrick's Day!  

© 2015 Lessons by Molly.  All rights reserved. I love "singable" books for children t!e   

Friday, February 13, 2015

free-printable-valentine's-day-cards

Valentine's Day is a fun day for children to bring cards and treats to class and exchange them with their classmates.  But it can be a day of embarrassment for a child that is unable to bring in a set of cards.  In the story, Franklin's Valentines (by Paulette Bourgeois), Franklin loses his cards on his way to school and he is upset that he can't reciprocate while his friends give him cards.  As teachers, we've all had the "Franklin" student in our classroom.  This child makes amends the by bringing cards to school the day after Valentine's Day.  We've also had another kind of student.  I'll call this student "Riley".  Unlike "Franklin", "Riley" is not going to bring Valentine cards to school the next day.  "Riley" didn't lose cards on the way to school.  "Riley" doesn't HAVE cards.  As educators, we try to meet the cognitive needs of our students as well as their affective needs. Because of this, many teachers have scrambled on Valentine's Day to find an appropriate set of cards online to print for a child to enable him/her to participate in a card exchange. 

I made a few Valentine's Day cards that you can download.  You can find them near the end of this post.  Print as many as you need during a Valentine's Day "emergency".  I also made a set of Valentine cards that are available for purchase.  Both the free sample set and the priced set are easy to assemble.  There's no need for scissors - just fold each card twice.  The cards are gender neutral.  Both color and black and white versions are included.  The picture below shows how to assemble the cards:                                            


A toy can be taped inside the card.  Write the sender and the recipient's name on the back.


I used images from Laura Strickland from her website, My Cute Graphics to create the cards.  Below is a photo of what some of color cards look like.  There are 16 color cards and 15 black and white cards in the priced product.


Here are some of the black and white cards look like.  The children might like to color the pictures on the card they receive.


If you would like to view the priced cards at my Teachers Pay Teachers shop, click the image below.  Otherwise, view and click the final image for the free samples.


https://www.teacherspayteachers.com/Product/valentine-cards-531416

The picture below shows what's included in the free sample.  Click the image below to get them.                                                                 
https://drive.google.com/file/d/1nNj6xcmHKrTJePYn9L15VT049-fQHvmL/view?usp=sharing

Happy Valentine's Day!
© 2015 Lessons by Molly, all rights reserved.


Sunday, February 8, 2015

Lollipop Tree Do-It-Yourself

A favorite childhood memory of mine was going to the yearly school carnivals.  One of the events at the carnival was a "Lollipop Tree".  The way it worked is that you bought a ticket for a chance to win a prize.  Then you went to the "Lollipop Tree", and picked the color you wanted.  You pulled the desired lollipop out from the tree and viewed the end of the stick.  If it had a mark on it, you won a prize!  If there was no mark, you learned to be content with your sugary, consolation prize.

The big prize always eluded me.  Ah, if I only knew then what I know now about PROBABILITY!  I would have said to the volunteer manning the event, "How many lollipops are there?"  How many lollipops have a mark on the end?"  Then I would have calculated how likely it would be to get the BIG PRIZE.  Maybe I would have decided to walk away and save my ticket for something that was "CERTAIN".

This memory inspired me to create my own version of the lollipop tree.  I thought I would share the DIY with you.  It's VERY easy to make.  It took me less than fifteen minutes to put it all together.  It's also INEXPENSIVE.  Best of all, your students will LOVE their classroom "Lollipop Garden".
Here's what the finished, "Lollipop Garden" looks like.
Instead of having a "Lollipop Tree", I decided to have a "Lollipop Garden".  I needed to get the supplies.  Number one on the list was the lollipops.  I found some pink and red ones at a Family Dollar store.  I purchased two packages.   I found a plastic party bucket in the Valentine section at Walmart.  I went to their craft/floral section and found a foam disk.  The foam disk should be at least an inch thick because a thinner disk might not support the lollipop sticks in the project.  The measurement which were on the label of the disk were 1.18 x 8.8 inches.  The measurements from the label on the party bucket were 9.875 x 9.875 x 8.5. 

The price of the party bucket was $3.98.  The price of the foam disk was $2.97.  The packages of lollipops were one dollar each.  My total expenses for this project  (not including taxes) was $8.95.
Here's what's needed to make the lollipop garden.
The first thing that I did was cut the lollipops apart from each other.  The perforation between each wrapper was not very good so I needed to use scissors.  For one dollar a package . . . . I'm not complaining!
Use scissors to cut the lollipop wrappers apart from each other.
If you want to use the "Lollipop Garden" for a probability lesson later on, you will need to mark the bottoms of some sticks.
This stick has a black mark on the end.
Leave the plastic wrapping on the foam disk.  Firmly push the foam disk into the opening of the bucket.  Don't attempt to push it to the bottom of the bucket.
Leave the plastic wrapping on the disk. 
The disk will stay near the top of the bucket.  It should fit snugly in the bucket.
Plastic bucket with foam disk inside.

 Take one of the lollipops and push it into the foam disk.
Push a lollipop into the foam disk.
Once you have put your first lollipop in, you're ready to add the others.  You will want to think about the space provided on the surface of the disk along with the number of lollipops you plan to use.  You might want to push some lollipops down further into the foam than others.  This way, your "Lollipop Garden" will show different levels of "growth".
 
I used 13 red lollipops.  There is room for plenty more.  

Your students will be excited to have a "Lollipop Garden".  The "Lollipop Garden" is not just for Valentine's Day.  A spring themed bucket could be used with colorful lollipops taking this activity into the months of March, April, and May.   We added some artificial flowers to the display.

"Lollipop Garden" with artificial flowers.

 Here are a few ways you could use the lollipop tree garden in the classroom.

Probability:  Here is an experiment that you can try with your students.  This what you need to do to stage the event.  First, you will need to have the same number of lollipops as is the number of students participating.  Make this an even number.  Add one additional lollipop when there is an odd number of students.  As a result you will include yourself in the activity.  Next, mark half of the bottoms of the lollipop sticks with a permanent marker.  If you have 20 lollipops, 10 sticks will be marked.  Put the lollipops in the "Garden".  Then have each student withdraw a lollipop from the disk.  After all of the lollipops have been withdrawn, discuss the results with the students.  The event could be modified by changing the number of marked and unmarked sticks.

Collaborative Reward System:  Put together the bucket and foam disk.  Leave the lollipops out.  Tell the children something like, "Let's grow a garden of positive behavior."  As students are caught being good, add a lollipop to the "Garden".  The goal is to have enough lollipops for every student.  When there are enough lollipops for the whole class, everyone withdraws one.
Dramatic Play/Fine Motor Development: This activity is for prekindergarten and kindergarten.  For this center, I would use "fake" lollipops instead of real ones.  There are lollipop sticks available at craft stores.  Construction paper circles could easily be taped to the sticks.  Put the "Lollipop Garden" in a center area.  Allow the children to pull the lollipops in and out of the holes rearranging them as they desire.  

"Lollipop Sundae"

I found another method of making the "Lollipop Garden" that was even cheaper than the first method.  It took about 5 minutes to make it.  I found plastic sundae dishes in the Valentine section at Walmart.  They had red and pink.  I purchased one red sundae cup.  At the craft/floral section I found a foam semi-circle.  Since I did not use the pink lollipops for the first project, I did not need to purchase additional ones.  The plastic sundae cup was $1.48.  The foam semi-circle was $.97.  The project was less than $2.50 . . . . but if you included a pack of lollipops, it would be $3.50.  What a deal!

There is limited surface space on the semi-circle.  I was able to push 14 lollipops in.  There was enough room to put a few more.  If you have a large class and are trying to have enough lollipops for each student . . . . this won't work.
Materials use to make a "Lollipop Sundae"
I used the same steps as with the "Lollipop Garden".  I put the foam semi-circle into the sundae cup.  Once again, I did not remove the plastic wrapping from the semi-circle.  It was a perfect fit.  It shifted from side to side.  If that is an issue, use some hot glue to make it stick inside.  I did not take time to glue.
Put the foam semicircle into the sundae cup.  Use glue if desired.


Then I pushed 14 pink lollipops into the foam.  Voila!  Simple, affordable, and fun for the kids on Valentine's desk.  Set it on your desk and use it for a probability activity, reward system, or for any number of possibilities.
I put 14 lollipops into the sundae cup.  There was enough space to fit a few more.
Lessons by Molly © 2015  All rights reserved.

Wednesday, February 4, 2015

Valentine's Day First Grade Math

In my previous post I talked about the literacy component of my product titled, First Grade Math and Literacy Activities (Valentine's Day Week Style!)  You can read about it by following this link:  Literacy. 

I am going to show you how I would use the math component.  Part of this is going to sound a bit like a step by step tutorial.  The file includes probability skills, graphing, and problem solving.  There's is a lot to talk about!

1.  Probability

Before I get started, here's a little background information.  Probability is not a Common Core State Standard in first grade.  According to my research, it is taught in seventh grade!  However, first graders can be introduced to the basics of probability with the use of manipulatives.  A few simple terms can be taught to help them develop probability concepts.  Two of the easiest vocabulary words to get them started with are:  impossible and certain.  If you drop ten red cubes in a bag and ask your class how likely it is that you will pull a blue cube from the bag, they'll quickly get the idea of what impossible means.  Furthermore, when they're asked how likely it is that a red cube is pulled from the bag, the term, certain will easily be understood.  Once they have mastered these two terms, they are ready for three short phrases.  Those phrases are:  more likely, less likely, and equally likely. 

Let's get back to the probability activities that I created for Valentine's Day!  Once you have taught the terms mentioned above, your students are ready for the first probability activity.  It's called, "Probability in a Flash".  This is a large/whole group activity.  Each child will need a copy of the page on the right side of the photo shown below.   The sheet on the left side is for the educator.
 
The sheet on the left side is the demonstration page for the teacher.
The children cut out the cards and spread them out on their desks or tables.  They lift the appropriate card for each question that is asked.  This engages the whole class.  EVERYONE is answering EVERY question.  They do this through the use of their cards.  The teacher can quickly scan the room and determine who "gets" it and who needs more support.
The students put the probability cards on their desks.
The teacher sheet needs to be visible to the class.  It's a good idea to discuss the number of circles, triangles, and lightning bolts on the sheet.  The fact that there is one triangle and one lightning bolt should be emphasized.
The children should view the quantities for each shape before the teacher cuts it apart.
Cut out the shapes on the broken lines in view of the students. 
Cut the shapes out on the broken lines.
Put the "shapes cards" in a paper bag.  (A brown lunch bag will work well.) 
Put the shapes in a paper bag.
Ask the students questions such as, "Is a lightning bolt more likely or less likely to be pulled from my bag when compared to a circle?" (less likely)  As you ask your questions, students should respond by lifting up the appropriate card on their desks. After you have asked several questions, remove the lightning bolt and the triangle.  Do so within the children's view.  Then ask questions such as, "What is the probability of pulling a triangle from the bag now?"  (impossible)  "What is the probability of pulling a circle from the bag now?" (certain)

Return the lightning bolt and the triangle to the bag.  Then tell the class you are going to conduct an investigation.  You will pull a shape from the bag and record the results on the board.  (Make 10 recordings for best results.)  Return the shape to the bag before drawing another shape.  This will maintain consistent probability results which is derived from the original data of 8 circles, 1 triangle, and 1 lightning bolt.  When you are finished, the results that were recorded on the board can be discussed to reinforce students' understanding. 

The second probability activity uses the sheets called, "Sweet Probability Hearts", "My Sweet Data", and "Probably Pink . . . . I Think".

Start with the "Sweet Probability Hearts".  Have the children color the hearts according to the specified colors.  
Children color the hearts according to the specified colors.
 They then cut on the broken lines. 


The students will use the "My Sweet Data" sheet next.  They read each question, and circle to appropriate number according to their hearts' colors.  The purpose of the "My Sweet Data" sheet is to get the children to start focusing on the numbers for each color of the hearts as well as a color that is absent.  (The "child" (me) answered two of the questions incorrectly in the photo below.)
The child answered the first and third questions incorrectly.  There is 1 red heart.  There are 8 pink hearts!  (What was I thinking!)
Next, the children will put their hearts in a paper bag.

Students place their red, pink, and white hearts in a paper bag.
It's time to complete the "Probably Pink . . . . I Think" page.  They will fill in the bubbles in response to the statements provided.  There are two options.  There is a choice for "A" or "B".  Visual learners might need to see the hearts in order to respond to the statements.  If that is the case, the hearts should remain outside of the bag.
Students respond to the statements provided.
It's time for the students to draw hearts out of their bags!  Each time they pull a heart out, they record their results.  They color one of the hearts at the bottom of the page according to the heart color drawn from the bag.  They then return the heart to the bag (just as the teacher did when using the shapes).  They continue this procedure until the hearts at the bottom of their sheets are colored.  It's important that they return the hearts to the bag, after each draw.
Students take a heart out of the paper bag.  They then record (by coloring) their findings.
 2.  Graphing

The graphing begins with the page called, "A Garden of Roses".  Each student will need his own individual dice for this.  If you don't have dice, I highly recommend getting a few packages for classroom use.  I purchased my dice at a dollar store.  By the way, dice are great for subitizing practice!
Dice is great for subitizing practice!
The key printed on the sheet indicates the color needed.  Students roll the dice, then color the first rose accordingly.
Students continue to roll dice and color roses until their "garden" in complete.
They continue rolling the dice, and coloring the roses as they go along.
It's a roll of the dice!
The finished sheets are now their data sheets!  They'll need to use the data sheet to record information on their graphs.
This is the data collection sheet. 
* Some students might be able to tell you what the probability for any given color would be from the dice roll.

Students use their "A Garden of Roses" sheets to record information on the graphs. For this, I chose a bar graph in vertical form.
I created a bar graph in vertical form.
The photo below shows a finished bar graph using the data collected from the "Garden of Roses" sheet.
Students transfer their data from "A Garden of Roses" on to the graph.
3.  Problem Solving

I wrote a few short stories and created questions for each.  I made this into a little problem solving book.  I left space at the bottom of each page for the students to draw a few sketches to help them solve the problems with.  The pages from the book need to be folded in half as shown in the photo below: 

Fold the pages in half.
They then need to be stapled together:
Staple.
I completed a readability check on the sum of the text from my stories.  I discovered that they were measured as a third grade level.  This was too high!  I found out that the level could easily be dropped.  This was done by changing a few of the proper nouns and adjusting a few other words.  I was able to bring the reading level down to second grade.  This is still too high for first graders.  Therefore, I recommend that the "stories" be read to the children by an adult.  The pages from the book are shown in the remaining pictures.  Please note that the  text was not changed when the photos were shot.  The outcomes to the problems did not change.
 

One key problem solving strategy is to draw pictures or make a sketches. 


I think the expression goes something like, "There are many roads to the same destination."

Apparently this is true with math as we encourage our young learners to find their own ways to solve problems.


We allow them to see that there is more than one process to finding the solution. 


We accentuate comprehension instead of algorithms.


They discover that math can be creative!

I hope you have a great Valentine's day week with your students.  If you are interested in the packet I've shown you, click on the picture below see it at my Teachers pay Teachers store.    

https://www.teacherspayteachers.com/Product/valentines-day-activities-1099558


Lessons by Molly © 2015  All rights reserved.