Showing posts with label Spring. Show all posts

Sunday, April 28, 2013

Mother's Day Flower Craft

Can you believe that Mother's Day is just two weeks away?  Many teachers have their students make a gift to honor mothers for this special day.  The gifts made are often derived from a craft activity the children create in class.  The more the child completes of the gift on his/her own, the more meaningful it is for both parent and child.  Some moms even save the gift and admire it years later.  As with any craft activity done with children, avoid using objects that have the potential to become a choking hazard.   

Here's a super simple craft activity that will have many mothers smiling on Mother's Day.  There's a flower pattern at the end of this post you can download for the craft.  There "May" also be a few other goodies for you!  Hint, hint . . .
This flower craft is easy to make and is sure to bring a smile to the face of any mother on Mother's Day!  Click the image of the black-line tropical flower to get the free pattern! Then trace it on poster board.  Allow the children to decorate the flowers with magic markers making each flower unique.  Glue or fasten cupcake liners inside the centers of the flowers.  The "seeds" are sequins that are glued inside the cupcake liners.  The stem and leaves are made from green construction paper.
These flowers will bring a smile to any mother's face!
 Materials needed:

1.  Flower pattern - one per child  (Use poster board or heavy card-stock.)
2.  Glue
3.  magic markers
4.  Large, decorative paper cupcake liners - one per child  (Michael's Crafts and Walmart have these.)
5.  Small objects which will represent the "seeds".  (I used sequins in the photo shown in this post but pompoms, paper confetti, or a photo of the child will also work well.)
6.  9 x 12 inch green construction paper - two sheets per child
7.  stapler
8.  adhesive dots (optional)

Directions:

1.  Give each child one flower pattern.  Have children decorate with markers.
2.  Give each child one cupcake liner.  Have children squeeze glue into the cupcake liner.
3.  Have children "sprinkle" the "seeds" inside the cupcake liners where the glue was placed.  Allow the glued "seeds" to dry overnight.  Shake the cupcake liners out over the trash container the next day to remove any "seeds" which did not adhere to the inside of the liners.
4.  Give each child one green piece of construction paper.  Model drawing leaves on the board.  Have the children draw leaves on their paper using a pencil.
5.  Have the children draw the veins on the leaves with a pencil. 
6.  Have children outline their leaf drawings with a dark marker.
7.  Have children cut out their leaves.
8.  Using another sheet of green construction paper, fold over 4 or 5 times.  This becomes the "stem".
9.  Staple the stem to the flower.
10.  Staple the leaves to the stem.
11.  Glue or use adhesive dots to attach the cupcake liner to the center of the flower.

This flower craft is easy to make and is sure to bring a smile to the face of any mother on Mother's Day!  Click the image of the black-line tropical flower to get the free pattern! Then trace it on poster board.  Allow the children to decorate the flowers with magic markers making each flower unique.  Glue or fasten cupcake liners inside the centers of the flowers.  The "seeds" are sequins that are glued inside the cupcake liners.  The stem and leaves are made from green construction paper.
Children decorate the flower pattern with magic markers.

This flower craft is easy to make and is sure to bring a smile to the face of any mother on Mother's Day!  Click the image of the black-line tropical flower to get the free pattern! Then trace it on poster board.  Allow the children to decorate the flowers with magic markers making each flower unique.  Glue or fasten cupcake liners inside the centers of the flowers.  The "seeds" are sequins that are glued inside the cupcake liners.  The stem and leaves are made from green construction paper.
Sequins are glued inside the cupcake liners to represent the flowers' seeds.

This flower craft is easy to make and is sure to bring a smile to the face of any mother on Mother's Day!  Click the image of the black-line tropical flower to get the free pattern! Then trace it on poster board.  Allow the children to decorate the flowers with magic markers making each flower unique.  Glue or fasten cupcake liners inside the centers of the flowers.  The "seeds" are sequins that are glued inside the cupcake liners.  The stem and leaves are made from green construction paper.
The cupcake liners stick to the flower pattern with adhesive dots.

This flower craft is easy to make and is sure to bring a smile to the face of any mother on Mother's Day!  Click the image of the black-line tropical flower to get the free pattern! Then trace it on poster board.  Allow the children to decorate the flowers with magic markers making each flower unique.  Glue or fasten cupcake liners inside the centers of the flowers.  The "seeds" are sequins that are glued inside the cupcake liners.  The stem and leaves are made from green construction paper.
This photo shows a sheet of adhesive dots. They stick on both sides. These can be purchased at craft stores.


This flower craft is easy to make and is sure to bring a smile to the face of any mother on Mother's Day!  Click the image of the black-line tropical flower to get the free pattern! Then trace it on poster board.  Allow the children to decorate the flowers with magic markers making each flower unique.  Glue or fasten cupcake liners inside the centers of the flowers.  The "seeds" are sequins that are glued inside the cupcake liners.  The stem and leaves are made from green construction paper.
Fold the green construction paper over 4-5 times. Staple the flower and leaves to the stem. The picture above shows the back of the flower.    
     https://drive.google.com/file/d/0B-I90irRe2FHVFdWOXR4bE1GWEU/edit?usp=sharing

Click the picture above to get the tropical flower pattern.

This flower craft is easy to make and is sure to bring a smile to the face of any mother on Mother's Day!  Click the image of the black-line tropical flower to get the free pattern! Then trace it on poster board.  Allow the children to decorate the flowers with magic markers making each flower unique.  Glue or fasten cupcake liners inside the centers of the flowers.  The "seeds" are sequins that are glued inside the cupcake liners.  The stem and leaves are made from green construction paper.
The flowers can also be used as a bulletin board display.  Perfect for the month of May!
    The freebies below are based on the May 2013 calendar. 

Click on the words "May calendar numbered" for the one shown above.
Need a quick calendar skills review?  Click on the words, "Calendar Language" to get the printable shown above.
Click on the words, "May calendar" for the one shown above.

Oh but this is not enough!  I am celebrating May with other bloggers and joining their linky parties!  Go visit and enjoy more spring freebies because . . . it's the "Merry, Merry Month of May"!


Lessons by Molly © 2013  All rights reserved.

Saturday, April 20, 2013

Earth Day Primary Free Teaching Resource

It's almost "Earth Day"!  Are you ready to celebrate with your class?  Classroom "Earth Day" activities teach children how to become good stewards of our planet.  Science and Social Studies standards can be taught while celebrating "Earth Day".  In Virginia, "Earth Day" activities connect with the first grade Science standard 1.8 which is to discover the Earth's resources.

April is a busy time of year for most teachers and it's hard to find time to plan one more seasonal lesson.  Here are a few (preschool through first grade) "Earth Day" ideas that won't take much time.  There's also a link to a freebie at the end of this post. 

1.  Use blue and green streamers to represent the water and land.  Cut enough so each child has one blue and one green streamer.  The children wave the streamers in the air (one streamer in each hand) while you sing and listen to Earth themes songs such as "Big Beautiful Planet" which can be found on Raffi's Rise and Shine album.  

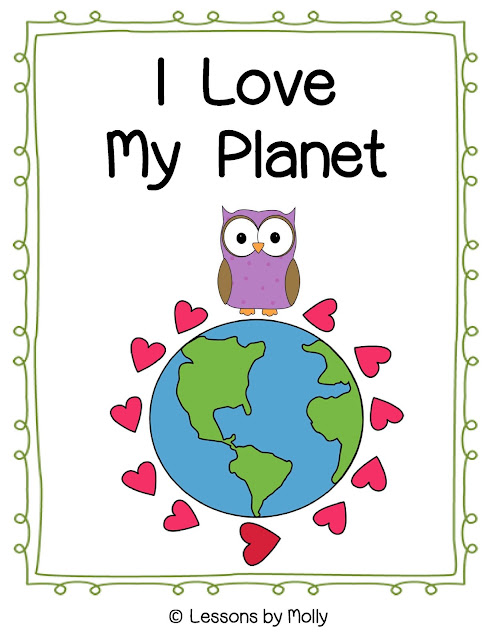
Reduce, reuse, and recycle!  This free printable booklet teaches children essential concepts necessary for becoming planet Earth's caretakers.  A cute little owl tells the children how it loves the planet.  The key concepts are: keep the environment clean, recycle, conservation of energy and water, collect rain water, use plants to improve air quality, and reduce the amount of goods consumed.

Below are links to where you can get the song.


 2.  Wear "Nature-Pleasing" clothing on "Earth Day" or any day.  Shirts with trees, flowers, or animals will work nicely.  Send a note home with your students at least one day before having them dress up for nature.

Reduce, reuse, and recycle!  This free printable booklet teaches children essential concepts necessary for becoming planet Earth's caretakers.  A cute little owl tells the children how it loves the planet.  The key concepts are: keep the environment clean, recycle, conservation of energy and water, collect rain water, use plants to improve air quality, and reduce the amount of goods consumed.

 3.  View nature-loving websites!  National Geographic Kids is a great way to motivate children to love and appreciate animals.  Their website has tons of videos for kids to watch about mammals, fish, birds, and insects.

4.  Make an interactive model of the Earth.  You'll need green and blue acrylic paint, a Styrofoam ball and a few other things for this.  See the tutorial HERE.  

5.  Read books that promote the "Reuse, Reduce, and Recycle" concept.  Click the image below to download the printable booklet that discusses this concept.  
Reduce, reuse, and recycle!  This free printable booklet teaches children essential concepts necessary for becoming planet Earth's caretakers.  A cute little owl tells the children how it loves the planet.  The key concepts are: keep the environment clean, recycle, conservation of energy and water, collect rain water, use plants to improve air quality, and reduce the amount of goods consumed.

 Here are some directions for assembling the reading booklet:

1.  Print the pages.  Copy single sides.
2.  Fold all the pages including the cover page.
3.  Insert the folded pages into the cover page using the proper numeric sequence.  (The folded sides face outward with the exception of the cover page.  The cover page acts as a folder for the other pages to slip inside.)

If you'd like, view the video tutorial.  Hover over the bottom right corner and click to view in full screen mode.  Press your escape (esc) key when finished.


© 2013 Lessons by Molly, All rights reserved.


Monday, April 1, 2013

April 2nd is World Autism Awareness Day. Together we support each other as we push forward in our efforts to improve the lives of those touched with autism. Autism Speaks Light It Up Blue - Join Today

Sunday, March 24, 2013

Spring Basket Sort

One of my favorite Show and Tell activities is a "spring basket" sharing.  The week before Easter Sunday, I would send a note home asking that an EMPTY basket be brought to school.  The specified date would be shortly after Easter.  This way the children could bring a basket received from the "Easter Bunny" or choose any other basket from home.  We don't do the "Show and Tell" the first day back from the holiday.  I send a reminder about the activity on that day.  If there is nice weather on the scheduled date and you have a grassy outdoor location, the "Show and Tell" can take place outside.

How many attributes can be used to describe baskets?

If the activity takes place inside the classroom, the children can gather together in a circle at the carpet area.  It begins with everyone seated with their own basket in their laps.  Everyone takes a turn making a brief comment about their own basket.  Then they pass the baskets around the circle until all baskets have been rotated and their own basket is back on their laps.  Finally, the baskets are sorted by using a variety of attributes.


I thought I would show you a few ideas of how the baskets could be sorted!
 

I start of simple with two groups such as "brown baskets" and "baskets that are not brown".  I gradually increase the complexity of the sorts.  I am the one that is sorting the baskets!  The children's role is to name the sort.  If I have baskets that don't fit into the groups I set them aside and tell the students that the group set aside is not included in the sort.  This helps them with their own future sorts.  They learn that not everything will "fit" in the categories given.  I also use an "everything else" group with some of the sorts.  An example of this is to have a group made of plastic and a group that is made of "everything else".  The "everything else" group could be wood, metal, cloth and everything else.   


If the children get stuck on a sort and can't seem to name it, I give them the name of one of the groups.  Such as, "This group has oval bottoms.  What do the other groups have?"  Then I ask them more about the sort.  Such as, "How did I sort these?"  (Shape.) If I want to work on additional skills, I ask questions like "How many more baskets have handles than baskets without handles?"

There are plenty of opportunities in the classroom to sort objects by color, size, and shape.  The basket sorting activity allows me to create unique categories that the children may not have seen.  The fact that the children are bringing their own item to schools allows them to have a sense of ownership and makes the activity meaningful to them.

Here are some categories that I like to use with basket sorts:

1.  Size - big, medium, small
2.  Color - one color (solid colored), multicolored
3.  Material - wooden, plastic, metal, cloth
4.  Handle Type - rigid (fixed), bendable (moveable or hinged)   
5.  Handle Type - has a handle, does not have a handle
6.  Shape - circular, rectangular, oval, square
7.  Embellishments - ribbon, bow, none

That's all for now!

Molly, Lessons by Molly
© 2013  All rights reserved.


Saturday, March 16, 2013

Saint Patrick's Day in the Classroom

This year Saint Patrick's Day and spring break are so close together that it's hard to find enough time to get all the activities completed which we enjoy doing with the little ones.  Here is an easy art activity the children can do in the classroom.  You will need black construction paper, acrylic metallic-gold paint, plastic disposable bowls, and a few small potatoes.  In addition to these materials, you will also need smocks to protect the children's clothing and newsprint to protect their desks or tables.
Prepare the activity in advance:
1.  Trace a pattern of a pot on the black construction paper.  Make one for each child. 
2.  Mount the "pots' on white or green construction paper. 
3.  Cut the potatoes in half.
4.  Pour the gold paint in the throw-away bowls.
5.  Place the potatoes in the bowls.
6.  Have children use the potatoes like stamps to press circular shapes on their "Pots of Gold".

Use SMALL potatoes.
Cut them in half.

Put them in a bowl of gold paint.
Here's a blank "Pot of Gold" that is ready for a child to stamp "Gold Coins" on to.
Click the words, SAINT PATRICK'S DAY - FREE TEACHING RESOURCE.

Another fun Saint Patrick's Day activity is to go on a scavenger hunt.  We love to pretend that a leprechaun has visited our classroom.  The leprechaun has left a mess by tossing anything that's green out of place.  Although we have to clean up a green mess, he makes up for it by providing us with a surprise.  We have to follow clues the leprechaun left behind to get to the hidden treasure.  The children walk around the school, stopping at various locations such as the school office, library, auditorium, gymnasium, and computer lab.  Finally they arrive at the last clue which leads them to the treasure.  Sometimes the treasure is "Magic Mix".  The "Magic Mix" is really pistachio pie filling mix.  Of course if you do this activity, make sure that there are no dairy or nut allergies in the classroom.  Here's what you need:
1.  Four  (3.4 ounce) packages of JELL-O brand pistachio instant pudding & pie filling
2.  1 half gallon of milk
3.  a large clear container for mixing the pudding inside - one with a very secure lid (I used the Rubbermaid Carafe for the container)
4.  a long spoon
5.  plastic cups to serve the pudding in, and plastic spoons
*You might also want a measuring cup.
This is everything you need to make "Magical Leprechaun" pudding.
Remove the cardboard packaging from the JELL-O pistachio mix.  This makes it appear more mysterious.  Write something on the remaining packaging, such as "Magic Mix".  If you like, decorate it with shamrocks, March themed stickers, or anything else that has an Irish theme.


If you are using the "Magic Mix" as the treasure, find a cute or interesting looking container to put the magic mix inside for the find.  I used an orange container with some Easter grass to foreshadow things to come.

Put the pistachio pie filling in a large container. Make sure the container is large enough for the mix and the milk.

You can test to see if your container is large enough by measuring water into it beforehand. The ratio is one package of mix to two cups of milk. Four packages of mix is equivalent to one half gallon of milk. (8 cups of milk = half gallon) This method will allow you to omit measuring out the milk in a measuring cup.  You can pour a full half gallon of milk directly into the container. I ended up with more milk than my container could hold but the difference was not significant enough to alter the desired results.
With a secure lid, the contents will not spill out even when positioned upside down.
It's very important that a secure lid is used.  Otherwise, you're likely to have a mess.  The container I used said, "Extra Secure Lid Seal" and they weren't kidding!  If you are unsure about your container, place it inside a large plastic bag when you are shaking.  Additionally, positioning one hand firmly on the lid while shaking will help avert a milky mess.  A clear container allows the children to view the transformation.   
Now the hard part.  You have to shake and shake.  And shake some more.  This will be an excellent work-out for your upper arm muscles!  This method of making the pudding is a deviation from the directions on the JELL-O box but it works just the same. 
 It's a good idea to have another activity ready for the children to work on while your shaking the mix.  If you did the scavenger hunt, perhaps they could draw pictures or write about it.  Ideally, a community volunteer would be of benefit to you at this time.
After about five minutes of shaking, stop and remove the lid.  Use the long spoon to scrape the inside bottom and the sides of the container.  This will help loosen any powder that has not mixed with the milk yet.  Put the lid back on and begin shaking again.  This will take you another 5 minutes.  Then check the pudding again and stir once more with the spoon.  Repeat for 5 more minutes if needed.  Depending on how vigorously and continuously you shake, the Pistachio pudding should appear in less than 15 minutes. 
It takes 15 minutes to make "Leprechaun's Pudding".
Pour the "Leprechaun's Pudding" into plastic cups and serve.  Some children will love this treat and ask for seconds while others may choose not to eat it.  Yummy!  For a follow-up activity, purchase some pistachio nuts for the children to taste.


February 25, 2015  I have updated and UPGRADED a Saint Patrick's Day product that I sell at my "Teachers Pay Teachers" store.  It's a treasure hunt that takes the children to various locations around the school.  Use the "Magic Mix" as the treasure that is discovered, chocolate gold coins, or anything you'd like to provide the children with as a treat.  This product underwent major overhaul!  I could not be more happy with the end results!  I've changed the graphics and some of the font styles.  It now includes both BLACK ink and COLOR ink options for the clues.  I have also added one of my READING BOOKLETS readers.  I have titled it, Get the Gold.  The reader includes both black and color ink options. Many children don't have books available to them at home.  It's important to be able to offer children little books (when we are able to)  which they can take home and keep.  I am measuring the reading level on the reading booklet at mid-first grade.  The product now has two writing activities instead of one.  Additionally, I've added word cards and an assessment to go with the reading booklet. Click on the image below to go directly to the product.     
https://www.teacherspayteachers.com/Product/saint-patricks-day-613019
If you are looking for clues that are ready to go for your Saint Patrick's Day leprechaun's treasure hunt, you might like to view the product above at Teachers pay Teachers.  Click on the picture to go directly to the product description.  

Lessons by Molly © 2013  All rights reserved.