Monday, August 19, 2013

Educational Calendar Display Set

I am excited to tell you about a few of my newest products which are available at my Teachers pay Teachers store.  They are calendar display sets.  

I designed these for educators that have limited wall space in their classrooms.  The display shown in the photo below will fit on a 48 inches wide x 36 inches tall bulletin board.  (120 1/2 cm x 90 cm)  If you space is larger, you'll have room to add your own calendar specials.  The measurements for the numeral cards are included in the product description.  

The image below is large but it was the best was to show the items that are included with the set.

https://www.teacherspayteachers.com/Product/calendar-skills-display-set-with-blue-bird-theme-825675
Click on the image above to view this teaching resource at my shop.


There are two calendar sets available.  One set is decorated with cute little bluebirds and the other set has adorable panda bears.  

Each calendar display includes TWELVE sets of numeral cards!  This way, the children can look forward to each new month with a new set of numeral cards. 

The numerals 1-31 are printed on each set of numeral cards.  There is a different theme for each month.  The  photos below show some of the bluebird monthly sets.  Three sheets of paper will print one month's worth of cards.  There are also some blank cards for each month.  Use the blank cards to write in special days or events.  There are inner-borders on the numeral cards.  A different color border is used for each of the twelve sets of numeral cards.


The photo below is a close up of the bluebird numeral cards for the month of December. All the graphics used are the original artwork of Cheryl Seslar at Raggedy ScrappinThe numeral font is from Fonts4Teachers.  


I have included headers for each month of the year.  If you'd like, list all the months on your calendar display, or show just the header for your current month.  The border colors for the months of the year match the borders for the numeral cards for each month.
 
Printers vary in their print outcomes.  Therefore I have included a link for a color swatch test for the border colors. If you'd like, download the image below and print it to see how the colors will look when you print from your own printer or school printer.  This will also provide you with the exact measurements of the numeral squares for the calendars.

https://drive.google.com/file/d/0B-I90irRe2FHU1pzUHlickREc28/view?usp=sharing
Border Color Swatch Test
There are headers for the days of the week, seasons of the year, and the year itself.  "Yesterday, Today, and Tomorrow" headers are also part of this file.  I chose to design these horizontally in the same manner as how a sentence would be written.  There are cards for each day of the week.  These will fit between the phrases and the period at the end of the sentence on the header.


There are six picture/word weather cards. I kept these simple. The weather cards are for: sunny, snowy, cloudy, rainy, stormy, and one picture that shows both sunny and cloudy. There is a placeholder that the weather cards can be fastened on when they not in use.  The placeholder can be stapled to the bulletin board that you use for your calendar display.

I've also included a calendar chart(You will need to find a local printing company to print it.)  The spaces for the numeral cards on the chart are sized for the numeral cards in this set.  If you'd like to learn how to create your own chart, or if you'd like a FREE blank calendar display chart, view the post here.  Go to the end of the post and click on the final image.  
 
Teaching Tips: 

1.  Defining your local weather as "Partly Cloudy", "Partly Sunny", "Mostly Cloudy", "Mostly Sunny" and so on, are confusing terms for young children to comprehend.  Consider using the phrase, "Sunny and Cloudy" to describe such a day.

2.  Monthly student weather graphs can be a great activity for your students to practice recording data with.  But what happens after the students record the weather for the day and the weather changes?  Establish a set time for recording the weather each day.  Tell students, "We are recording the weather at 1:00 p.m.  Our record reflects the what the weather was like at this time of the day." (Or whatever the designated time.)

Common Misconceptions Children Have About Weather:

1.  The day's weather must have just one attribute.  (Wrong!  The weather can be sunny, snowy, and cold - all in one instant.  Weather can be measured by its precipitation, temperature, wind, humidity, and more.)

2.  The weather is constant in a given day.   (Wrong!  The weather is in a state of flux.)

3.  If it's a sunny day it must also be a hot day.  (Wrong!  It can be both sunny and cold or cloudy and warm.)

4.  We have snow only in the winter.  (Wrong!  Snow can come throughout the seasons depending on your location on the planet.)


Lessons by Molly © 2013  All rights reserved.

Sunday, August 18, 2013

Writing-Prompt-Once-In-A-Blue-Moon-I . . .

We're going to have a "blue moon" this week!  It's scheduled for Wednesday, August 21st.  The Earth's moon does not change to a blue color during the blue moon.  The term is used to describe the second full moon in a single solar calendar month.  This happens about once every two or three years making it a rare event.  Hence the idiom, "Once in a blue moon . . . " started to be used in the English language.

The coming of a blue moon gives teachers a chance to create a fun writing prompt for students.  I made a few FREE writing prompts that you are welcome to used within your classrooms.  Here are some sample student exemplars:

The black and white writing prompt has a solid black line for the headline and baseline.  There are broken lines at the mid-line.
There is a solid green line for the baseline and a solid blue line for the headline.  I used broken lines for the mid-line.  I refer to the baseline as the "floor" and the headline as the "ceiling" with lower elementary children.
The activity sheet shown above is for students that are preliterate with writing.  They can draw pictures and dictate words or dictate a sentence to an adult.  Having the children create a pictorial representation is helpful for vocabulary development with the words "often" and "rarely".  This can be done after a classroom discussion comparing every day activities with rare events.

Click on this link to get the free writing prompts:  WRITING PROMPT for ONCE IN A BLUE MOON.

If you wish to show the images above with your students on the SMART board, click on this link:  SMART NOTEBOOK WRITING PROMPT MODELS for ONCE IN A BLUE MOON.

Here is a fun food activity you can do in school this week with the blue moon event.  Check for students with food allergies before doing this!  Remember that nuts, dairy, wheat, etc. . . can be hidden in unlikely foods.  You will need the following ingredients that are shown below.  The blue food crystals are optional.  In addition to the ingredients, you will need to get paper plates and plastic knives.

1.  Banana Moon Pies
2.  Vanilla Frosting
3.  Blue Food Coloring
Optional:  Blue Food Crystals.
Open the frosting and the blue food coloring.
Drop some blue food coloring in the vanilla frosting.
Stir the food coloring into the frosting with a plastic knife.  Add more blue food coloring if you desire a darker shade of blue.
Once the desired shade of blue is achieved, you are ready to spread the frosting on the Moon Pies.
Open the Banana Moon Pies.
Begin spreading the frosting on the Moon Pies.  Older students can do this themselves with plastic knives.
Here are the frosted Banana Moon Pies.  We transformed our yellow moons into blue moons!
Can you incorporate a quick review of halves with your students?
Or a review of quarters?
Here's what one of the blue moons looks like with the blue food crystals.


Peek their curiosity about the moon's phases with this fun and yummy activitiy.

Here's my own sentence for the writing prompt:   
Once in a blue moon I take a ride on my spaceship!


© Copyright 2013  Lessons by Molly.  All rights reserved.

Thursday, August 15, 2013

Back to School Sale 2013!

I'm having a "Back to School" sale at my Teachers Pay Teachers store!  The sale will take place from Sunday, August 18th through Monday, August 19th.  Stock up on teaching resources for the school year.  Everything in my store will be 20 % off.  Use the promo code, BTS13 to get an additional savings.  Don't forget to use the "Apply" button after entering the promo code.  Enjoy shopping and grab some great deals!


Lessons by Molly © 2013  All rights reserved.

Saturday, August 3, 2013

Free Teaching Resource-August Calendar -Smart Notebook August Calendar

August is here!  Soon it will be time to go back to school.  Many teachers are busy decorating their classrooms and preparing for the first day of school.  Gone are the days when school began after Labor Day.  Today, many schools open a week or two before Labor Day.  To celebrate the beginning of a new school year, I decided to create an August calendar freebie packet.  In addition to the PDF packet, there is a SMART Notebook file that can be downloaded separately.  It is also free!  The SMART Notebook file can be used if you have this type of software available in your school.  You will need to use SMART Notebook 11 for the file to work properly.  A lower version of SMART Notebook will be incompatible.

I am happy to let you know that the graphics I used for both the PDF file and the .notebook file were created by Laura Strickland.  Her website is:  mycutegraphics.com

These files will download separately.  This packet is appropriate for first and second grade levels.  It is designed to help the teacher meet the following Common Core State Standard:  1.MD.C.4 - Measurement & Data Points.  Some of the images appear blurry due to compressing the file for faster web viewing.  They will not look this way when you open and print the file.  Here is what you get with the PDF:

You get an August calendar for the children to refer to when they are answering the questions from the other pages. Make enough copies of this so each student has one.

You also get a partially numbered calendar. Make copies and have the children fill in the missing numerals. This could be used as a quick assessment at the start of the school year to see which of your students can form numerals correctly as well as complete a numeric sequence. (I used the ABC Print font from Fonts4teachers for the numerals shown here.)
 

Students fill in the bubbles with the correct answer.  There isn't visual provided within the PDF to permit the children to know what will happen on August 21st from question # 3.  It will be up to the educator to think of an event for that date or she can use fact that there is a full moon on this date.  There is a visual provided in the SMART Notebook file for this.

There is a small scale version of the calendar on this page for the students to refer to.


Here is the link that gets you to everything above.  Calendar-Skills-Printables-August 2013 

Below are some slides from the SMART Notebook file.  There are a few review slides which I did not show here.  You have my permission to change the background color I used if what is shown does not suit your needs.


The numbers on this slide will move on and off the calendar.  Create your own calendar activities with this slide.

I used the object animation tool to create ovals that appear to change colors.  When an oval is touched, its color will appear to change to red or green.  An oval beside the correct answer will become green.  An oval that is incorrect will become red.

The numbers on the calendar shown on this slide will not move.  It is a screen captured image from the original.

Before students can answer questions # 1 and # 2, they will need to have an understanding of the concept of "first" and "last".  A good activity to complete beforehand is to play "Shuffle the Line".  Have the children form a line.  Ask a child to name the person that is first in line.  Ask another child to name the person that is last in line.  Have the children walk around the classroom.  Then have them get in line again.  Ask the questions again.  "Who is first in line?  Who is last in line?"  Repeat at least one more time.

Can't wait for the full "Blue Moon" although this one appears to be yellow.

I used the transparency feature instead of the highlighter tool to make the word, "August" stand out for this question.

This time I wanted the students to focus their attention on the number of "Saturdays" in August.

On this slide I "highlighted" the year 2013.  I also used the shape tool to make the star that is seen on the calendar. 

I "highlighted" a row on the calendar to show the number of days in one full week.

On this slide I alternated the colors in each row to make the "full" weeks in August show up.

All the days within the month are "highlighted" on this slide.


Using symbols and keys are important mapping skills for early elementary children to develop.  (This question is not included in the PDF file.)


Here is the link to get the free SMART Notebook file:  SMART_Notebook_Calendar_Activities_August 2013.

Lessons by Molly © 2013  All rights reserved.


Thursday, August 1, 2013

Puzzle Assembly Directions

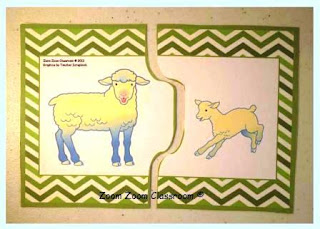
Get these two piece puzzles from my Teachers Pay Teachers store.  I updated this design in August of 2013.  Get the updated puzzles with this link:
 
Two_Piece_Puzzles_Adults_and_Babies.

Below are directions that can be used to make the two piece puzzles.  There are two methods.  The first method requires the use of heavy card-stock with no lamination.  The second method requires the use of lamination with thick film. 

Method 1 - Without Lamination:


Step 1: Print the puzzles on heavy card-stock.

Step 2: Cut on the outer lines.

Step 3:  Cut through the center line which will create the puzzle.
Method 2 - With Lamination:

Complete Steps 1 & 2 from the directions above.  (If you are planning to laminate with the thick film, you can print the sheets on plain paper.)  Do NOT complete step 3 from the "Without Lamination" method.  Continue by following the picture-directions below.

Laminate the half-sheet puzzles using 5 mil pouches.  (I recommend using the GBC HeatSeal Longlife Laminating pouches.  Make sure the laminating machine you plan to use is compatible with this type of film before purchasing.)

The puzzles will look like the picture above when the lamination process is finished.

Cut on the outer lines of the puzzle.  This is the solid, green, outer line from the picture shown.  (This step is done twice - once before laminating and once after laminating.

Cut though the center line.  You are cutting through a laminated puzzle.  IMPORTANT!  Do no trim.  Doing so will cause your puzzle to become misaligned.

The puzzle is now in two pieces.  Each piece will have its own 4 corners.  Make a slight snip in each of the corners.  This is a total of eight snips per puzzle.  This causes your puzzles to have slanted corners.  The thick laminating film causes corners to become sharp.  This method ensures that your students will have great puzzles to work with.  What child wants to prick himself/herself on a puzzle corner?

The 6 blue arrows show the locations of where the 8 small snips are made.  This will give the appearance of a small "v" at the top center of the puzzle and an inverted "v" at the bottom center of the puzzle.  This is a much more "Kid-Friendly" method of making the puzzles! 

In addition to the farm animal adult and baby puzzles, I also created a Number to Numeral puzzle set .  Below is a picture of the Number to Numeral puzzle set.  I updated it in July 2014 to include the number ten which is not shown in the picture below.

I included a black and white version along with the color sheets within this file.  You could use the black and white version to create family take-home packs for your students to practice the standard at home.  This file supports Common Core State Standards CCSS Math Content.K.CC.B.4 and CCSS Math.Content K.CC.B.5.  Here is a link to the product:  Two_Piece_Puzzles_Number_To_Numeral_Match ups_Farm Animals  
I also made a picture to word set.  Below is a picture of the picture to word set.  I updated this set as well to include a mouse.  Mice are NOT a farm animals.  They're pests!  Although they exist on farms.  That's why cats are handy on a farm . . . . they help control the mice population.
The following sellers helped make these products turn out well.  Visit their stores with the links provided below:


Lessons by Molly © 2013  All rights reserved.