One such idea, includes the use of large lima beans which teachers spray paint red on one side. The other side of the bean is left white. When developing the concept of the number four, teachers give each child four beans. The children place the beans in a small plastic cup or some other type of container. Then they dump the beans out of the cup with a red or white side showing on the bean. The children record what they see on a worksheet, put the beans back in the cup, and repeat the sequence several times. At the end of the activity, the students can record the addition sentences that correspond with the data recorded. (I recommend that the students use the red color as the first addend when writing the addition sentence.) Later on, when the next number concept is developed, students use five beans in the cup. As the children advance in their understanding of number concepts, the number of beans used increases as well. Click on the word worksheet to go straight to the bean worksheets developed by Mathematics Their Way. Click on the word blackline to see more resources from the Center for Innovation in Education Inc.
 |
| These old beans served me well. I'm retiring them now. |
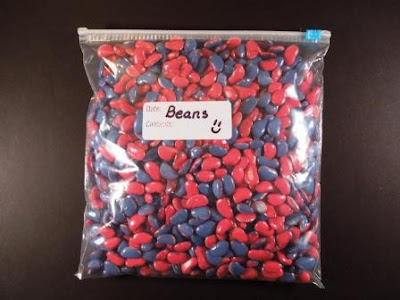
Then one year, I noticed another teacher's beans. She had the brilliant idea for spray painting the other side of the beans blue! So this year I got around to making my own set. Here are my directions with "How To" photos . . . just in case anyone else wants to have a go at this.
1. Buy the large sized Lima beans. Two 16 ounce bags should do the trick. I used three bags and figured I could always give some away.
2. Buy one 12 ounce can of blue spray paint and one 12 ounce can of red. I bought my paint at Michael's Crafts. You will end up with extra paint. Make sure to get your teacher discount at Michael's!
3. Read and follow the directions on the spray paint cans.
4. Put on your old clothes and your old flip flops. You might end up wearing a little paint!
 |
| Put your old flip flops on. You might spray a little paint on yourself. |
6. Spread the beans out on newspaper. Lay the beans flat.
 |
| Red and blue spray paint, Lima beans, and some newspaper is all that's needed! |
 |
| Spread the beans out evenly on the newspaper. |
 |
| The red side is finished |
8. Now comes the tedious task of turning each bean over to the white side. Once all beans are on their white side, spray with the blue paint. Allow paint on the beans to dry.
 |
| Flipping beans is a tedious task! |
 |
| Gotta love the blue color! |
9. Sorry, your not done yet. You'll want to check through your beans for spots you've missed. You won't want the little guys asking you if its blue or red! It's a good idea to put a second coat on. I did this on the red side but didn't put an extra coat on the blue side.
 |
| The final product. |
 |
| Gift your extra beans to another teacher. |
 |
| Children toss the beans out of the cups and record the outcomes on a worksheet. |
 |
| Now my grass has a hint of red and a small patch of blue. |

I love this idea! I have made lima bean counters before, but I always have the same problem with white. Spraying the other side blue is brilliant!
ReplyDeleteThank you for commenting! Glad to know I'm not the only one that had this problem. The activity runs more smoothly since I made the change.
DeleteWow, what a lot of work, but a great resource. Two-color counters are great for probability as well as odd/even.
ReplyDelete- Deirdre aka Evil Math Wizard
Come visit my blog at Evil Math Wizard.
Deirdre,
DeleteIt did take a little work but the nice outdoor weather that day made things easier. I wish I had made the two colored bean counters earlier! It's been so much easier for the kids to color with red and blue . . . and it's easier for me to check the work without the white color to look at.
What a great idea! Thanks for sharing! I have some yellow/red counters in my classroom, but I'd love to have these as well. :)
ReplyDelete-Gayla
Teach On.